BrainFartLab
Passion projects and ruminations related to IT development.
Project maintained by brainfartlab Hosted on GitHub Pages — Theme by mattgraham
Related
- Cellular Automata: introduction
- Cellular Automata: simple automata
- Cellular Automata: mobile automata
Cellular Automata: simple automata
As I venture further into my frontend programming journey, I come across WebAssembly. It is a binary instruction format with multiple programming languages able to “transpile” to it. I want to use it to outsource computationally expensive algorithms and code that is more intuitive to write in other programming languages. In this case, we wish to tackle simple automata in Rust. We are used to testing in Rust, so we can iterate a lot faster than resorting to a Javascript implementation.
For the frontend we will turn once again to Elm, expanding our knowledge to include: custom elements, SVG interactivity and URL parsing. Let’s get going.
We assume the read is familiar with chapter 2 of New Kind of Science. This will make reading the rest of the article a lot easier.
Math
We first want to present some definitions to the reader, assuming you read chapter 2 of NKS you will recognise the following concepts:
- window: each cell in our 1D universe (a line of cells) is updated according to its current value and those or the neighbours; if the adjacent neighbours are included our window size equals 3 (the cell itself + left neighbour + right neighbour), if the next two adjacent neighbours are included the window size is 5 (cell itself + two neighbours on the left + two neighbours on the right).
- cell states: we will use only two states; dead and live
- combinations: in a window centered at a chosen cell, we have a number of possible combinations of dead and live cells in that window, examples for a window size of three are live-live-live, live-live-dead, …, dead-dead-live, dead-dead-dead; the number of combinations is the number of cell states to the power of the window size
- rule index: a number representing the rule, which is the number of combinations and their outcome (e.g. live-live-live -> dead); we obtain the rule index by flipping the bit in an integer, the index of the bit is determined by the combination (e.g. live-live-live -> 8) and the bit itself by the outcome (e.g. dead -> 0, live -> 1).
To illustrate, if we have only dead and live cells with the window size of 3, we get 8 combinations:
dead-dead-dead
dead-dead-live
dead-live-dead
dead-live-live
live-dead-dead
live-dead-live
live-live-dead
live-live-live
If we enumerate them and give them outcomes:
0 dead-dead-dead -> 0
1 dead-dead-live -> 1
2 dead-live-dead -> 1
3 dead-live-live -> 0
4 live-dead-dead -> 0
5 live-dead-live -> 1
6 live-live-dead -> 1
7 live-live-live -> 0
we can construct the rule index as follows:
(0 << 0) + (1 << 1) + (1 << 2) + (0 << 3) + (0 << 4) + (1 << 5) + (1 << 6) + (0 << 7)
    = 0 + 2 + 4 + 0 + 0 + 32 + 64 + 0
    = 102
In our frontend we visualize this rule using our combinations view (white = dead, black = live):
 Interactive design for rule index manipulation
By clicking the individual combinations, you can toggle their outcome. It will also update the text box containing the numerical value of the rule index.
Rust
The Rust implementation ended up being small enough. We use the same bitvec library as we did for an earlier project for solving Sudoku puzzles. There was the option to use other libraries such as fixedbitset, however I opted for the extra available bitwise functionality offered by bitvec.
We decided to adopt the following assumptions:
- The “universe” or number of cells is not known at compile time, the user can adjust it in the web app.
- The universe is cyclical, meaning the right neighbour of the last cell in the bitvec is the first cell in the bitvec; vice versa the left neighbour of the first cell is the last cell.
The bitvec library offers some nice macros to represent bit vectors, which we made handy use of in our unit testing module. In the end, our implementation stores the rule as the rule index, the integer is sufficient to be able to perform the necessary computations. There is no need to unpack it and come up with elaborate data structures, unlike in later automata. The code to apply the rule is
impl Rule<EmptyState> for BasicRule {
    fn apply(&self, _: &mut EmptyState, universe: &mut Universe) {
        // the window mask helps us consider only the cells/bits in the window
        let window_mask = (2 as i8).pow(self.window_size as u32) - 1;
        let window_mask = window_mask as u8;

        let offset = universe.span() - self.window_size + 1;

        // a single integer is sufficient for intermediary storage
        let mut cache: u8 = universe.cells[offset..]
            .iter()
            .rev()
            .enumerate()
            .map(|(i, val)| {
                (*val as u8) << i
            })
            .sum();

        let bits = universe.cells.as_mut_bitslice();
        for mut bit in bits.iter_mut() {
            // shifting the window over the universe
            cache = (*bit as u8) + (cache << 1);
            cache &= window_mask;

            // outcome from the rule index
            *bit = self.rule_index & (1 << cache) != 0;
        }

        // since we first update cell 0 with the outcome for cell -shift, we must correct
        let shift = (self.window_size - 1) / 2;
        bits.rotate_left(shift);
    }
}
Since we update the cells in place, we use a single integer as a cache to keep track of old values. You will also notice that the first window constructed will have its rightmost cell be the first in the universe. All others cells will be the last (window - 1) of the universe, yet we are using the outcome and writing it to the first cell of the universe. This of course is incorrect, and we end up course correcting at the very end by shifting the whole universe to the left. Doing it this way means we don’t have to fiddle with indices too much.
WebAssembly
Adopting WebAssembly for our project was easy enough with the excellent tutorial (already showcasing Conway’s Game of Life) provided by the creators of rustwasm. On top of that, we made handy use of an already existing template to generate our skeleton to include Elm and Rust.
That said, there are some small caveats to keep in mind:
- Trait implementation for a struct cannot be exported to wasm, we made a simple wrapper function instead.
- One needs to be careful what is passed through the interface exposed to Javascript, in this first project we don’t run into problems since all we pass are some integers, but it does occur later on in more complex automata.
We had the option of using web-sys to go a step further and build our DOM in Rust, or draw on the canvas. In the end we opted to split that functionality and leave DOM manipulation and canvas drawing to Javascript instead.
Elm
Compared to our QuizCraft project we lose complexity in the form of multipage functionality and gain some in the form of Javascript interoperability and WebAssembly (not directly in Elm but in Javascript).
Custom elements
The novel element this project introduces in our Elm learning path is the custom element. It replaces ports as our gateway to Javascript interaction. A custom element is a Javascript class implementing the HTMLElement (or related) interface. As the developer it is up to you to declare a number of element attributes. These attributes can then be changed through Elm, and the custom element will in turn invoke functions on the Javascript side allowing us to react to changes in the attributes.
Let’s look at the Elm code first:
viewTape : Model -> Element Msg
viewTape model =
    E.el
        [ E.width E.fill
        , E.height E.fill
        ]
        ( E.html <|
            viewCustomElement
                [ mapCustomAttribute (RuleIndex model.ruleIndex)
                , mapCustomAttribute (WindowSize model.windowSize)
                , mapCustomAttribute (State model.state)
                , mapCustomAttribute (CellSize model.cellSize)
                , Html.Attributes.style "width" "100%"
                , Html.Attributes.style "height" "100%"
                , onStateChange
                ]
                [ Html.canvas
                    [ Html.Attributes.id "ca-canvas"
                    ]
                    []
                , Html.canvas
                    [ Html.Attributes.id "ca-counts"
                    ]
                    []
                ]
        )


viewCustomElement : List (Html.Attribute a) -> List (Html a) -> Html a
viewCustomElement =
    Html.node "cellular-automata"


mapCustomAttribute : AutomataAttribute -> Html.Attribute a
mapCustomAttribute att =
    let
        fields : { field : String, value : String }
        fields =
            case att of
                RuleIndex ruleIndex ->
                    { field = "rule-index", value = UInt64.toString ruleIndex }

                WindowSize windowSize ->
                    { field = "window-size", value = String.fromInt windowSize }

                CellSize cellSize ->
                    { field = "cell-size", value = String.fromInt cellSize }

                State state ->
                    let
                        command : String
                        command =
                            case state of
                                Idle ->
                                    "pause"

                                Pausing ->
                                    "pause"

                                Running ->
                                    "resume"

                                Resuming ->
                                    "resume"
                    in
                    { field = "desired-state", value = command }
    in
    Html.Attributes.attribute fields.field fields.value
The mapCustomAttribute is a helper function to introduce some more structure, but it can be seen that we are talking about a single HTML “cellular-automata” element. Here is what it looks like in HTML, with the two canvas elements as its children:
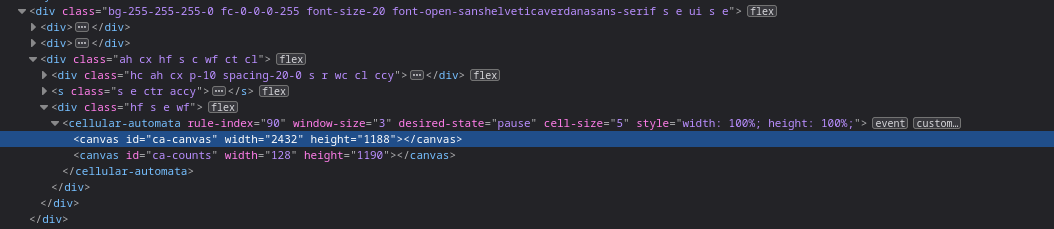 HTML custom element
On the Javascript side we showcase the skeleton code for the custom element:
customElements.define('cellular-automata',
  class extends HTMLElement {
    constructor() {
      super();

      // initialization code...
    }

    connectedCallback() {
      // code to run when the element is appended to a DOM element
    }

    attributeChangedCallback(name, oldValue, newValue) {
      switch (name) {
        case "rule-index":
          // ...
          break;

        case "window-size":
          // ...
          break;

        case "cell-size":
          // ...
          break;

        case "desired-state":
          // ...
          break;
      }
    }

    static get observedAttributes() {
      return ['rule-index', 'window-size', 'cell-size', 'desired-state'];
    }

    notifyState(state) {
      this.dispatchEvent(new CustomEvent('state-change', {
        bubbles: true,
        detail: {
          state,
        },
      }));
    }
  }
);
As seen above, you must specify the expected attributes in the observedAttributes method, a change in an attribute not part of this list will not trigger the attributeChangedCallback method.
We also included a custom method named notifyState as an example of how to relay information from Javascript back to Elm using custom elements. In this case our Elm app syncs its running state (referring to the animation state) with the Javascript code responsible for managing the canvas drawing. When Elm passes a desired-state of paused, then the Javascript code will halt the rendering of any animation frame. If this was successful, it will fire a custom event named state-change, informing Elm that the pausing was done successfully. On Elm’s side, we already displayed the onStateChange event as a HTML attribute for the node element. All we need now is a decoder:
onStateChange : Html.Attribute Msg
onStateChange =
    stateDecoder
        |> Json.Decode.map ChangeState
        |> on "state-change"


stateDecoder : Decoder (Maybe State)
stateDecoder =
    let
        mapState : String -> Maybe State
        mapState stateString =
            case stateString of
                "idle" ->
                    Just Idle

                "running" ->
                    Just Running

                _ ->
                    Nothing

        toDecoder : String -> Decoder (Maybe State)
        toDecoder state =
            Json.Decode.succeed (mapState state)
    in
    Json.Decode.succeed toDecoder
        |> requiredAt [ "detail", "state" ] Json.Decode.string
        |> resolve
We now have full interactivity between Elm and Javascript. The custom events makes it easy to extend upon instead of having to onboard new ports or include logic to differentiate between events on one port.
URL manipulation
The rule index text field in our app makes it easy to configure the automata rule, but we also want people to simply share a URL with other people with whatever interesting rule index they encounter. By inputting the URL, the app will automatically load the rule based on the supplied rule index as a query parameter. We solve this by updating the URL whenever the rule index is modified in the app. Since we want URL manipulation, we resort to the Browser.Navigation module to update the browser address bar whenever the rule index changes with:
import Browser.Navigation as Nav
import Url.Builder as Builder

update : Msg -> Model -> (Model, Cmd Msg)
update msg model =
    case msg of
        ...

        UpdateRuleIndex newRuleIndex ->
            let
                newUrl : String
                newUrl =
                    Builder.relative []
                        [ Builder.string "index" (UInt64.toString newRuleIndex)
                        , Builder.int "window" model.windowSize
                        ]
            in
            ( { model | ruleIndex = newRuleIndex }
            , Nav.pushUrl model.key newUrl
            )

        ...
And in reverse we need a parser to extract the rule index from the URL and load it when the page loads:
type alias Simulation =
    { index: Maybe UInt64
    , window: Maybe Int
    }


parseSimulation : Query.Parser Simulation
parseSimulation =
    Query.map2 Simulation (uint64 "index") (Query.int "window")


uint64 : String -> Query.Parser (Maybe UInt64)
uint64 key =
    Query.custom key <| \stringList ->
        case stringList of
            [str] ->
                UInt64.fromString str

            _ ->

init : () -> Url.Url -> Nav.Key -> (Model, Cmd Msg)
init _ url key =
    let
        defaultRuleIndex : RuleIndex
        defaultRuleIndex =
            UInt64.fromInt 90

        defaultWindowSize : Int
        defaultWindowSize =
            3

        simulation : Simulation
        simulation =
            { url | path = "" }
                |> parse (query parseSimulation)
                |> Maybe.withDefault
                    { index = Just defaultRuleIndex
                    , window = Just defaultWindowSize
                    }
    in
    ( { ruleIndex = simulation.index |> Maybe.withDefault defaultRuleIndex
      , windowSize = simulation.window |> Maybe.withDefault defaultWindowSize
      , cellSize = 5
      , state = Idle
      , key = key
      }
    , Cmd.none
    )
You will notice that aside from the rule index, we also include the window size as a query parameter. Since we are using a third party library for the rule index (represented as an unsigned integer of 64 bits) we used a custom parser. The init function is modified to use the parser to operate on the supplied URL and provide sensible defaults in case the parameters prove faulty.
SVG interactivity
We used the elm/svg library to draw our combinations interface pictured earlier in the Math section. The solution to incorporate interactivity is dead simple, since each combination can either have on (live) or off (dead) for its outcome. With this boolean nature, we do not have to add a lot of events to individial SVG elements and we can attach a message to the entire SVG (each combination is its own SVG):
drawCombination : Combination -> Int -> Msg -> Element Msg
drawCombination combination size msg =
    ...
    E.html <|
        svg
            [ SvgEv.onClick msg
            , ...
            ]
            [ g [] combinationCells
            , outcomeCell
            ]
All that is needed is an onClick attribute. In later automata, we will need to account for a whole array of effects for a combination and we won’t be able to resort to such a simple solution no more.
A downside of Elm
Whilst I have a lot of good things to say about Elm, we knew we’d find fault with the language at some point, as we would with any other language. So this is a small rant about third party packages and how they are dealt with. Third party packages can be registered on Elm packages, the site however is not an artifact store and it all it really does aside from displaying documentation is to link to a Github repository containing the actual Elm code.
This poses a huge problem, which we encountered when trying to apply malaire/elm-uint64. Using elm install will complain about the package source code not being available and a quick look at the Source link provided on the Elm packages website does indeed confirm the repository does not exist. The original author deleted it citing displeasure with the way Elm was being managed. Luckily, another Elm developer happened to have the package code stored locally and pushed it to Github, resubmitting it to Elm packages: MartinSStewart/elm-uint64.
This does make me more wary of any third party Elm libraries and the Elm ecosystem as a whole.
Hosting
For hosting we opted to leverage our AWS knowledge and simply create a S3 bucket configured to serve as a static website hosting solution using CDK. The code is available here.
In addition, we deploy a ServiceCatalog portfolio and product to easily onboard new Elm+Rust WebAssembly projects. The product will take a Github repo (assuming you set up an OAuth2 Codestar connection to your Github account) and a URL path (S3 path in bucket) under which the web app will be made available. In doing so, we can reuse our deployment strategy much quicker in the future for additional automata web apps.
Wrap up
We had a good idea of what new elements we needed to use to get this web app made, and no big surprises presented themselves along the way. We used custom elements for Javascript interoperability. We used SVG for drawing UI elements. URL parsing proved straightforward enough.
The simplicity of the model representing a simple automata rule allowed us to focus on these new elements, and passing information from Elm to Rust/WebAssembly became a non-blocker. The resuls can be seen on our Vault.